
Part 4: Setting Up the Reaction
11 Suggested Reaction Setups
There are various ways to set up a reaction, and you need to be sure what you are going to do and what equipment you will need before you start. Each time you do a reaction for the first time, make sure you do it on the microscale using appropriately small-scale glassware. Once the small-scale reaction is successful and the conditions/setup are optimized, you may scale up the reaction.
The following are some suggestions (not an exhaustive list) for reaction setups for various common scenarios:
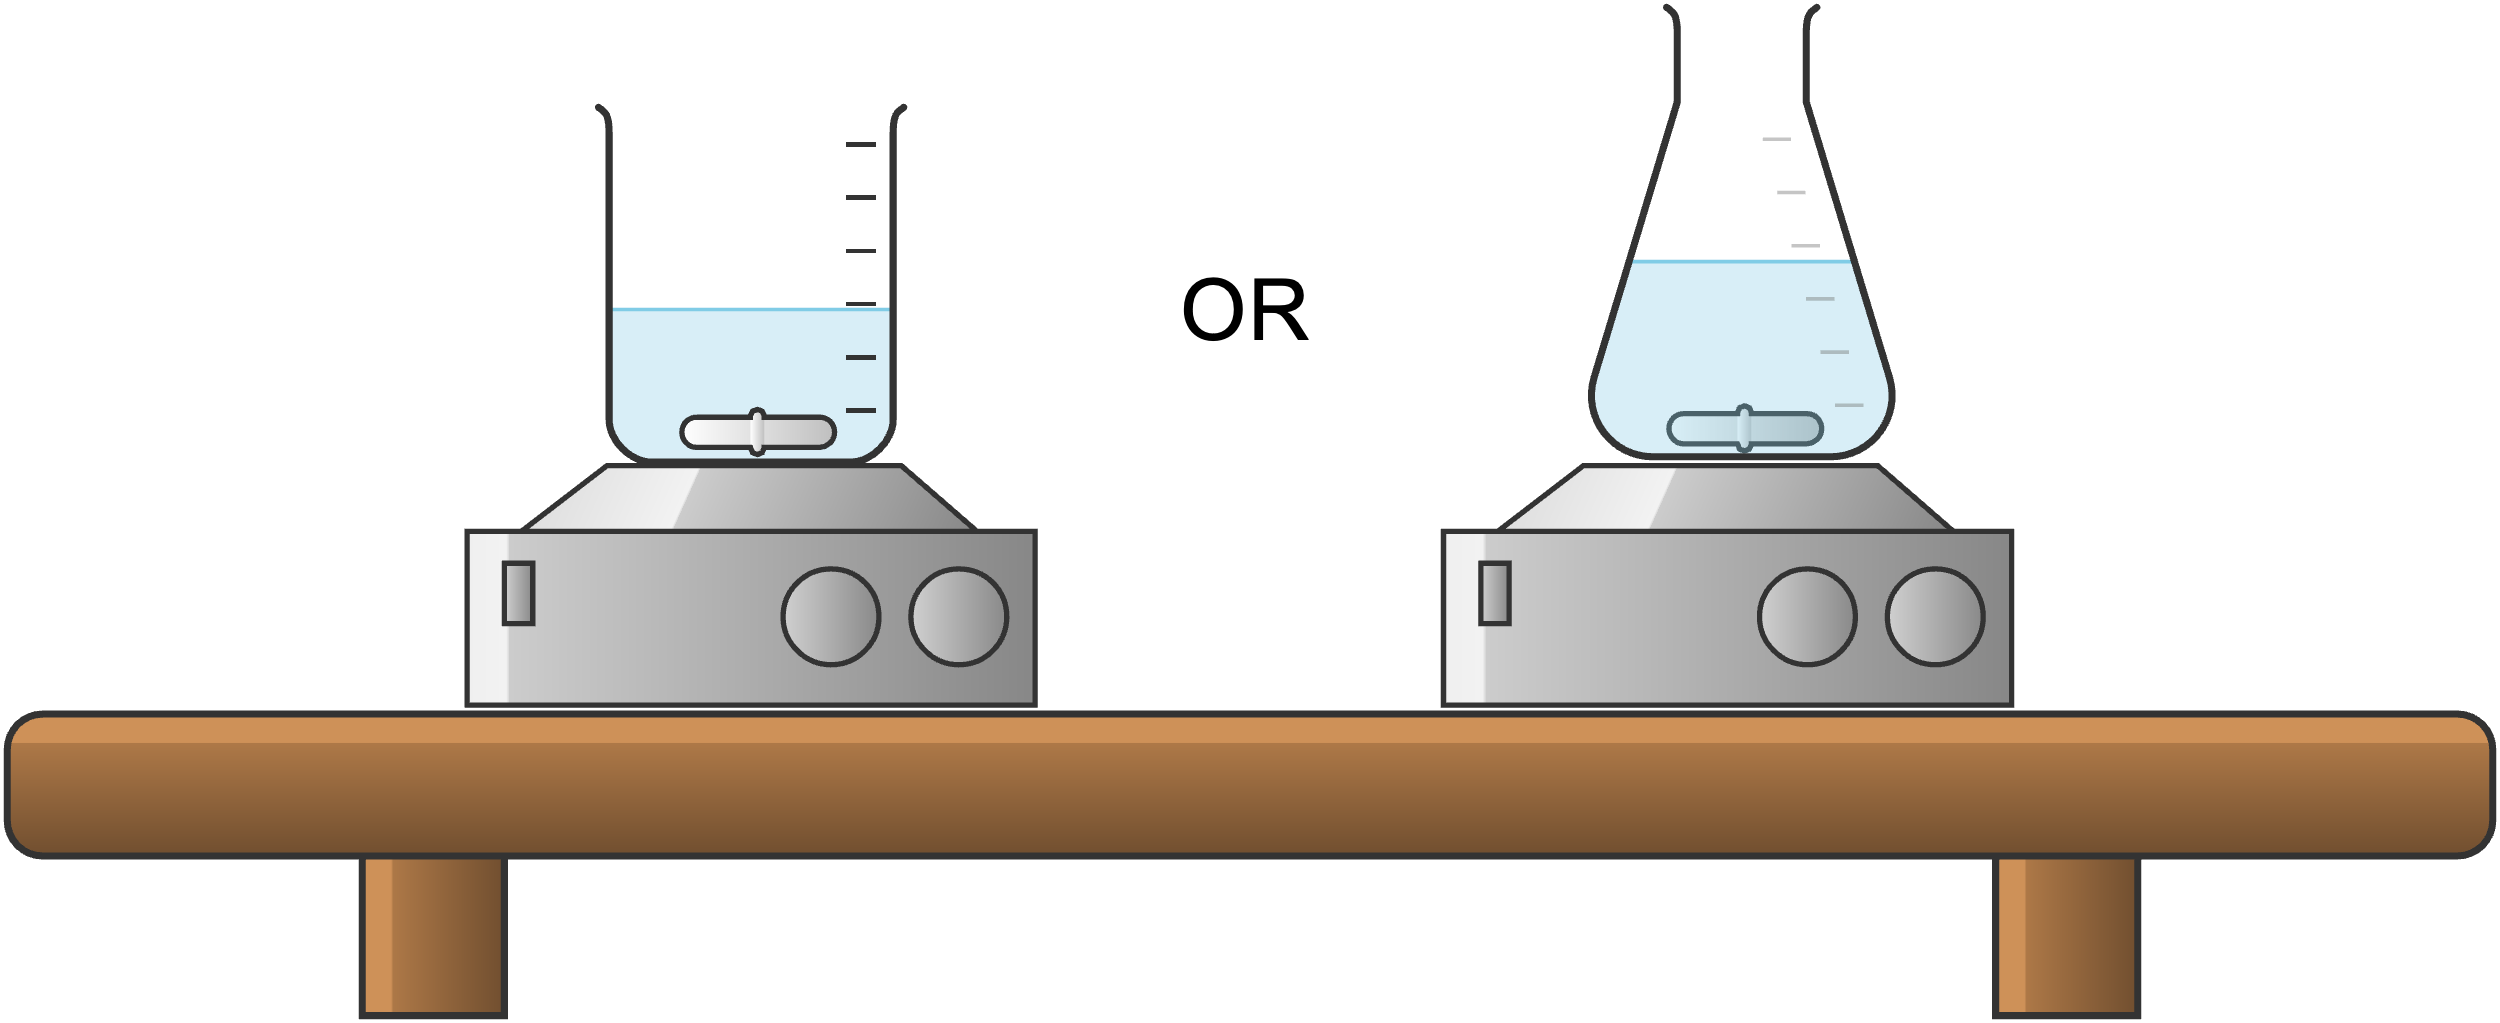
Set Up for Stirring Only
If you are sure that your reaction is not air-sensitive and will not need to be heated, it is probable that all you will need is a reaction flask of appropriate size, a stirrer bar, and a magnetic stirrer.
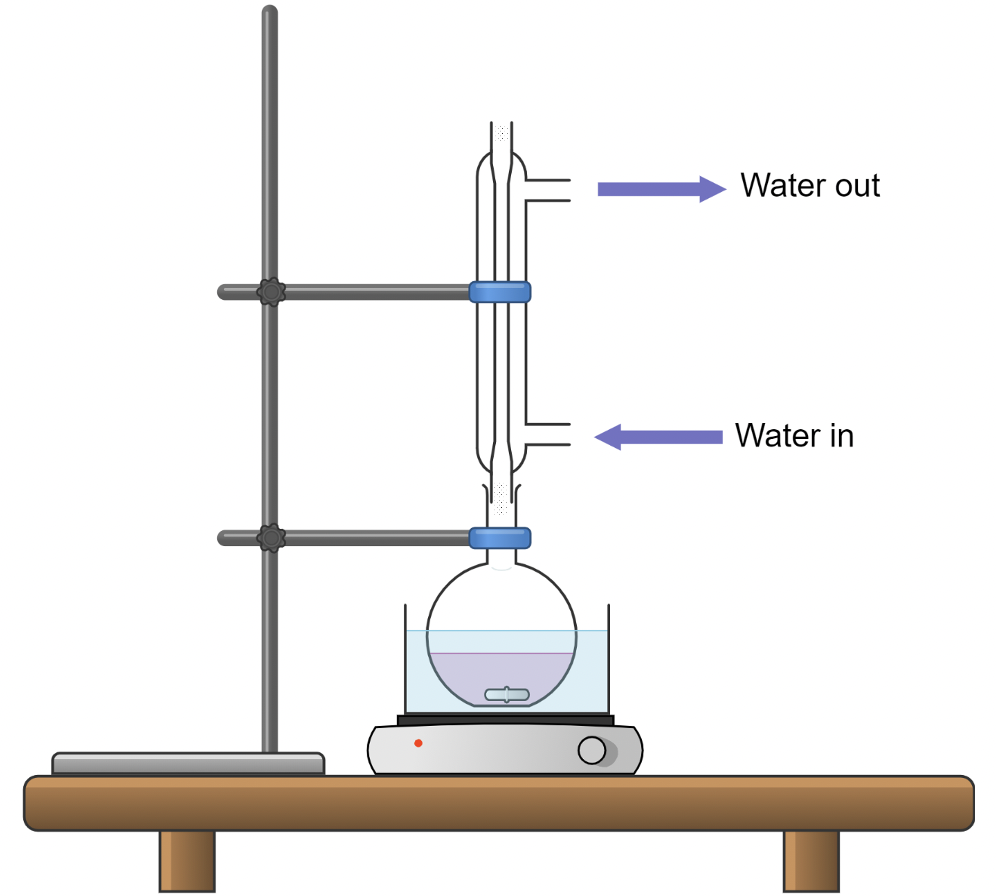
Set Up for Heating and Stirring
Set up the reaction in a water bath (or sand bath) on a hot/stir plate. Since you will be heating up the reaction, you will need to attach a reflux condenser to the reaction flask so that no solvent or product vapors will escape. Do not forget to run water through the condenser in at the bottom and out at the top. Make sure that the only outlet for vapors is through the condenser. If you have more than one neck on your flask, place a stopper in the other necks. Do not block the condenser top. Heating volatile liquids in a closed container is strictly forbidden.
Set Up for Mildly Water-sensitive Reactions
If you must perform a reaction that is somewhat water-sensitive, you can place a drying tube (a tube filled with a drying agent such as calcium chloride) in the neck of the reaction vessel or on top of the condenser if the reaction is to be heated.
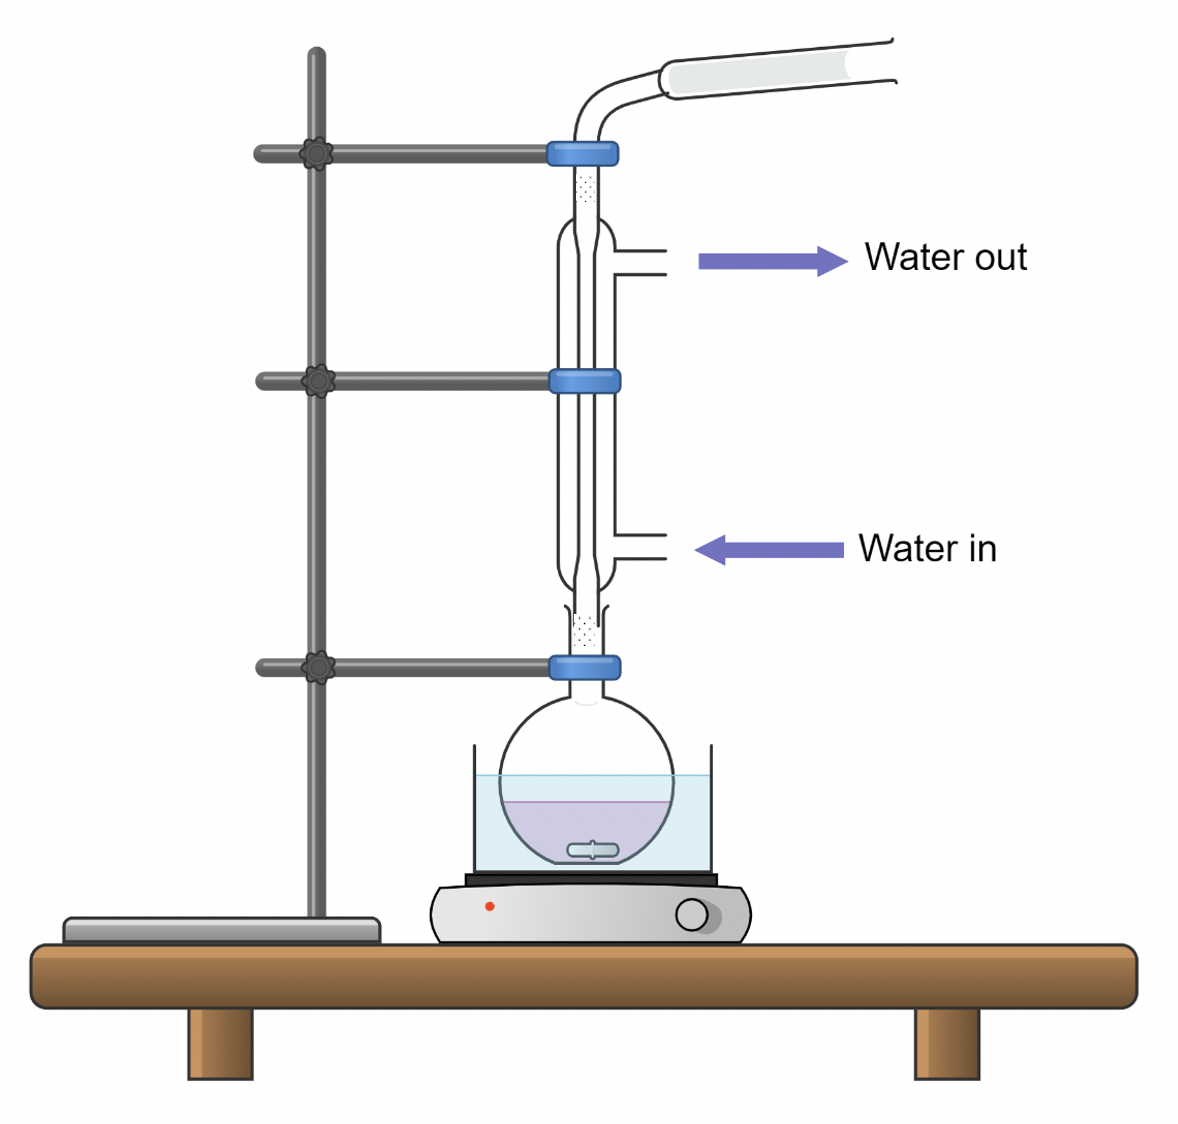
The set up in Figure 8 uses a condenser adapter and drying tube to ensure that vapors do not escape while minimizing the exposure to water. Keep in mind that all refluxes and reaction should be carried out in the fume hood, and in academic research, reactions that are sensitive may also require a glovebox. The condenser uses running water (note the positions of the water intake and output hoses) to cool any vapors arising from the reflux, and the drying tube fitted into the top of the condenser is filled with a drying agent to exclude water from the reaction apparatus. Be sure to carefully clamp and support each connection to a ring stand.
For reactions requiring a heating source, a heating mantle is a good option if available in an appropriate size for the reaction vessel. Other reactions may make use of water, oil, or sand baths, in which a large glass dish is filled with an appropriate medium that is heated either on a hot plate or with an immersion heater. When using one of these mediums to heat a reaction, insert a temperature probe or thermometer into that medium to monitor the bath temperature. In this course, we will not use a Bunsen burner. If you do use one, always check to see that there are no flammable liquids in the vicinity, and never leave a Bunsen flame unattended.
In these reflux setups, it is important to use the magnetic stir bar in the reaction flask to stir the reaction in a controlled manner. Stirring (just like use of boiling chips) provides an essential control in the reaction setup: these materials can prevent bumping. Bumping is a phenomenon of violent eruption of a liquid, heated at its boiling point.[1] These bubbles contain superheated vapor of the liquid, and the uncontrolled manner by which they are discharged from the liquid phase is not well controlled by the reflux apparatus. Thinking about P: Prepare for Emergencies, we can use a stir bar or boiling chip to provide a surface for these bubbles to form in a smaller, steadier manner, thereby preventing bumping.
Set Up for Stirring With Dropwise Addition
Sometimes you will need to carry out a reaction in which one reactant must be added slowly to the reaction mixture. This is often the case with very exothermic reactions or very reactive systems. Sometimes this reactivity does not show up in small-scale reactions, so if you have done a reaction on a small scale and are scaling it up, it is a good idea to add one of the reactants in a dropwise manner. This can be accomplished by using a pippette, a dropper and/or a dropping funnel (also known as the separatory funnel or sep funnel), as illustrated in Figure 9.
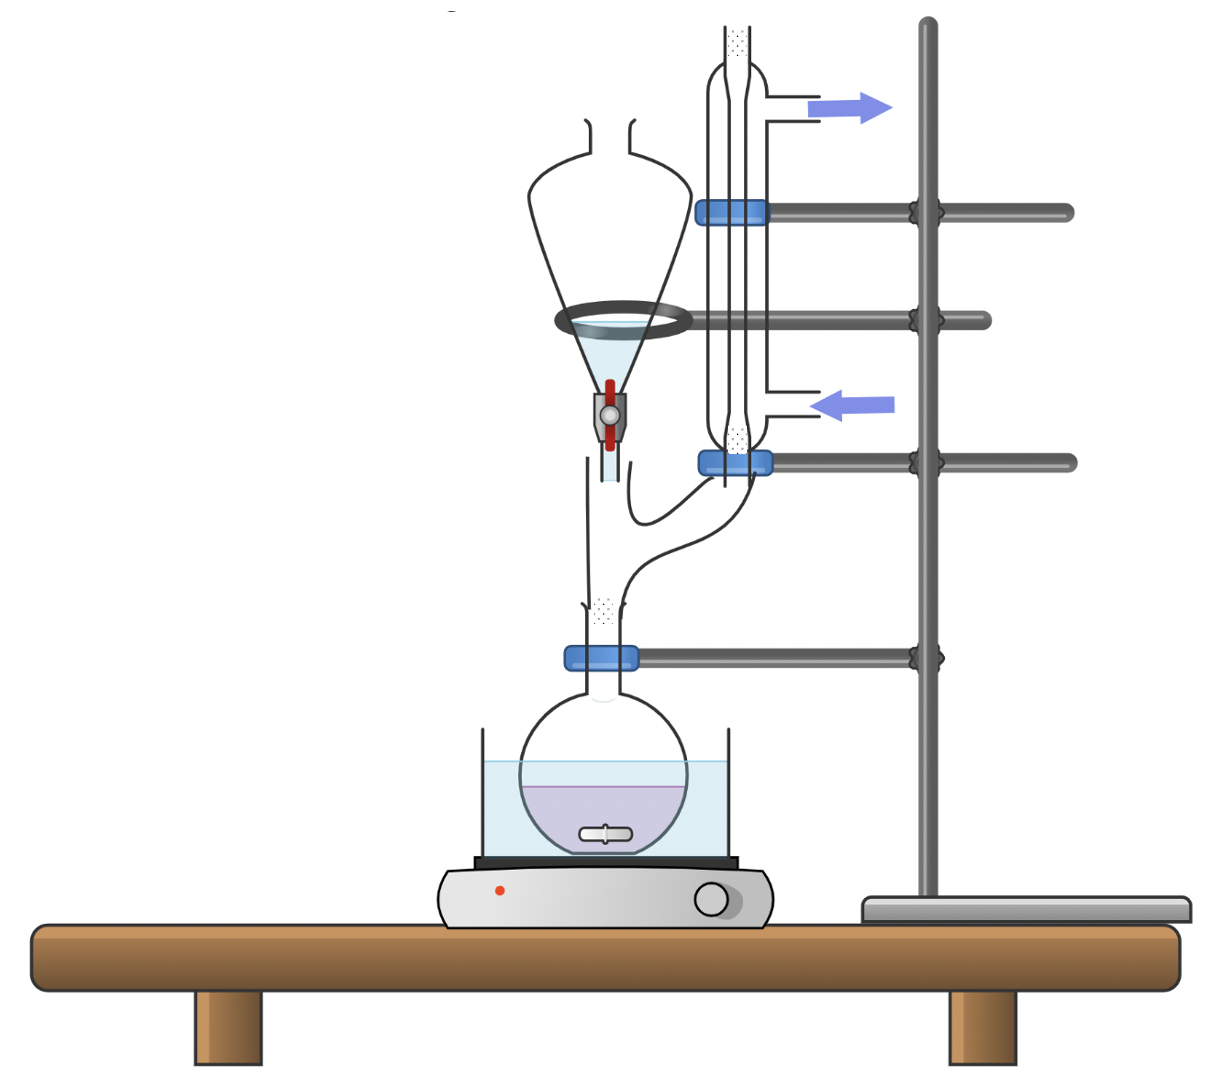
Depending on which round-bottom flask you have available, you may need a Claisen adapter (y-shaped adapter) to fit the dropping funnel and a condenser if the reaction is likely to produce vapors. Remember that all set-ups should be done in the fume hood. Allow the reactant in the dropping funnel to add dropwise into the stirred reaction mixture. If the reaction starts to heat up or give off fumes, stop addition for a while until the reaction returns to a less vigorous state. If a three-neck round-bottom flask is available, one neck could be used to monitor temperature with a probe or thermometer to monitor the temperature rise of any exothermic reactions.
- Lehman, J. W. Operational Organic Chemistry ↵
